Configuring vRealize Orchestrator to use Pure1 Integration
The more I play with our integrations the more I am impressed. My latest project within vRealize Orchestrator had me utilizing our Pure1 integration. This post will cover how to generate the needed pieces to configure the Pure1 Integration within vRO.
Requirements
- Pure1 Meta Workflow Package for vRO
- Powershell
- OpenSSL
- Windows 10 / Windows 2016 (Needed due to the Powershell Cmdlet)
After importing the Pure1 Meta Package, if we head to the Configure Pure1 Credentials Workflow we see we need the Private Key and the Pure1 REST Application ID. This is a bit different than Creating the JWT for the vSphere Plugin.
Cody Hosterman covered how to generate some of these pieces for using the Pure1 Rest API via Powershell.
Creating the Certificate
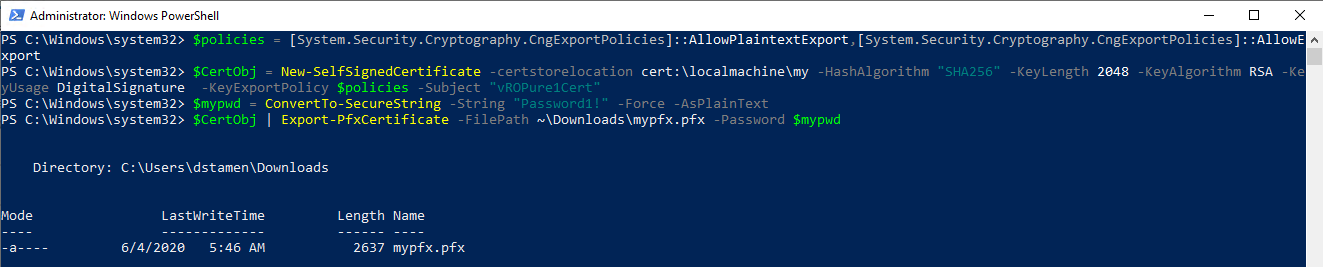
First we will need to generate a self-signed certificate to use for authentication.
$policies = [System.Security.Cryptography.CngExportPolicies]::AllowPlaintextExport,[System.Security.Cryptography.CngExportPolicies]::AllowExport
$CertObj = New-SelfSignedCertificate -certstorelocation cert:\localmachine\my -HashAlgorithm "SHA256" -KeyLength 2048 -KeyAlgorithm RSA -KeyUsage DigitalSignature  -KeyExportPolicy $policies -Subject "vROPure1Cert"
Next, a password will need to be specified and the certificate exported.
$mypwd = ConvertTo-SecureString -String "Password1!" -Force -AsPlainText
$CertObj | Export-PfxCertificate -FilePath ~\Downloads\mypfx.pfx -Password $mypwd
The next step requires extracting the public key and private key from the certificate. Since I am using Windows 10 I have the Windows Subsystem for Linux (WSL) Configured and will use that for my OpenSSL tasks.
openssl pkcs12 -in mypfx.pfx -nocerts -nodes -out converted.key
openssl rsa -in converted.key -pubout -out converted_public.key

Creating the Pure1 REST Application ID
To create the Pure1 AppID head over to https://pure1.purestorage.com/administration/apiappkeys and click on Register Application
Enter a Name for your ID. Enter the Public Key which can be retrieved from the converted_public.key file we previously generated and select a Role.
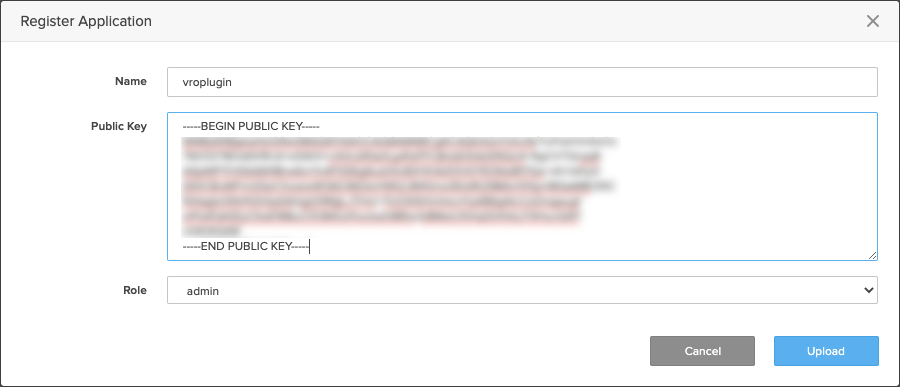
Once Upload is clicked we can see our AppID to use for the vRO Configuration.

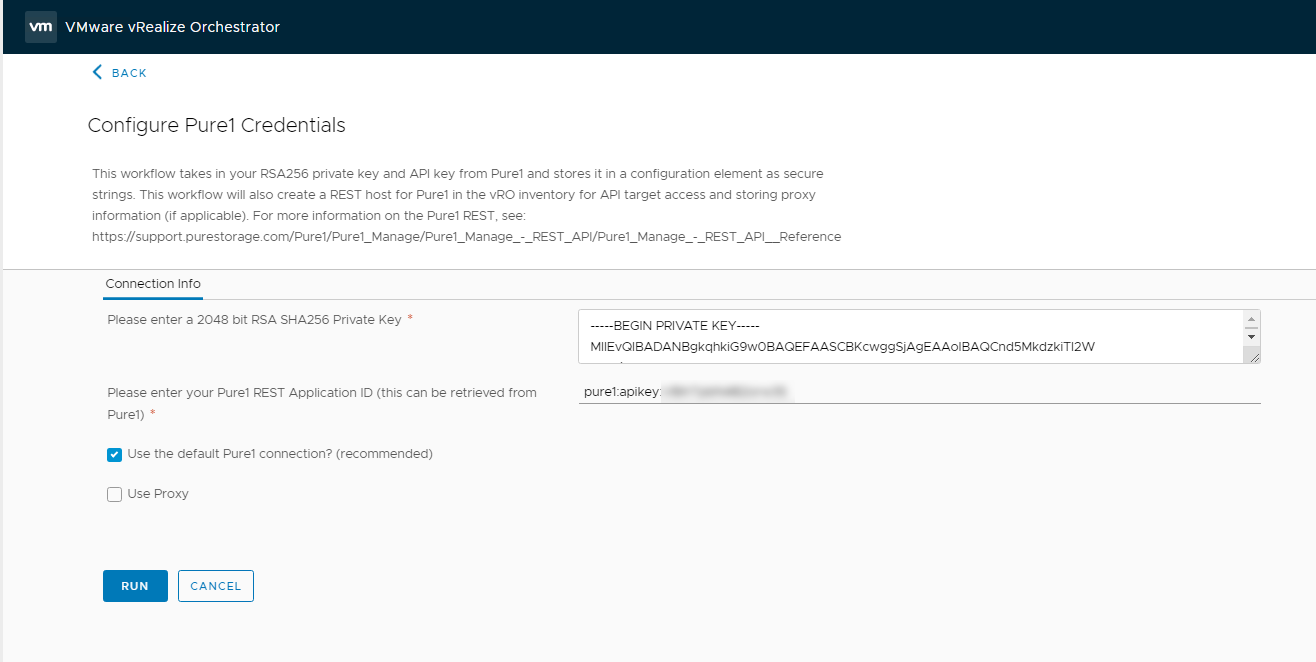
Configure the Pure1 Credentials in vRO
Now it is time to login to vRO and run the Configure Pure1 Credentials workflow.
The Private Key can be retrieved from the converted.key exported earlier. Be sure to only include the content after —–BEGIN PRIVATE KEY—– as the file will include some Attributes that can be left behind.
the Pure1 REST Application ID can be retrieved from our previous step in the Pure1 UI.
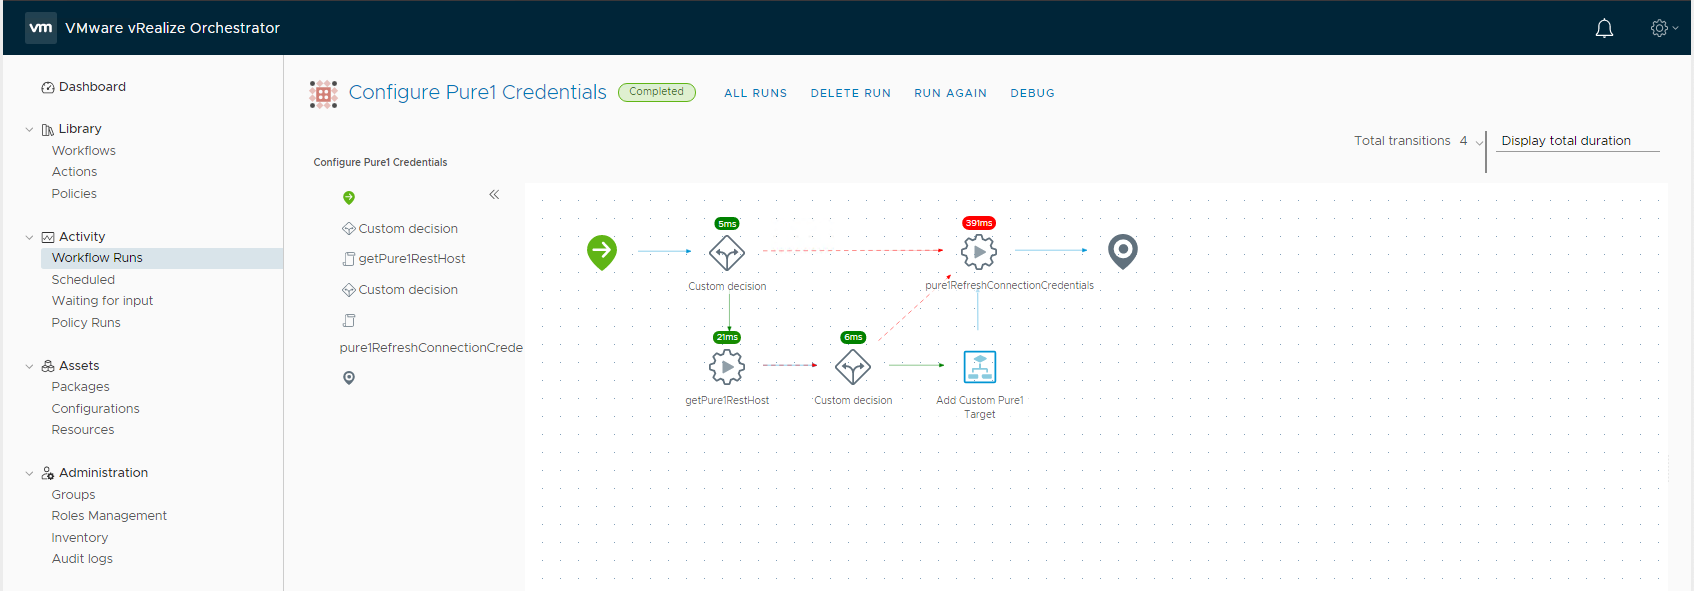
When the workflow is Completed we can then begin to utilize the Pure1 Integrations within vRealize Orchestrator.
Conclusion
Adding in Pure1 Meta integration can open up a world of additional workflows for your VMware environment. Stay tuned for a future blog post on how we can utilize these for Intellgient Provisioning of VMs. Questions or Comments? Leave them below!
comments powered by Disqus