Modify Resources of the NSX Advanced Load Balancer Service Engine for vSphere with Tanzu
In a previous role I have used Avi Networks and I love their load balancing solution. If you do not pay attention to the default settings, the Service Engines that handle load balancing deploy at 1 cpu and 2 gb of ram. With this blog I will cover how to change that if you have already deployed the NSX ALB and vSphere with Tanzu or any other Virtual Services.
Problems
If using NSX ALB Essentials you are stuck to using the Legacy Active/Standby HA mode which means you can not easily disable a VS and have a new Service Engine redeploy.
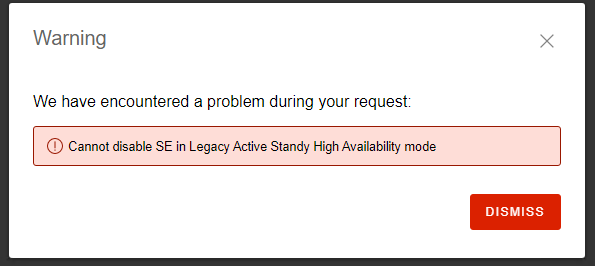
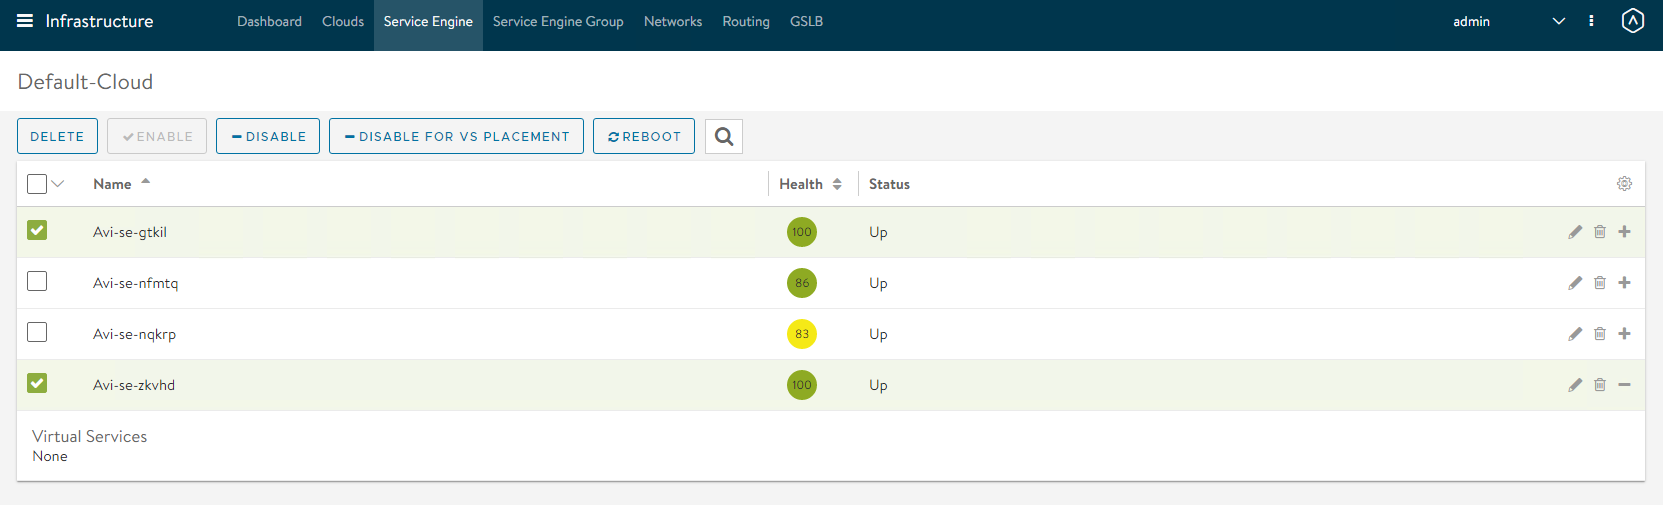
Even if we just tried to delete one of the Service Engines, we are not allowed
If using NSX ALB Enterprise you can follow the documentation on how to seamlessly increase a groups resources. With NSX ALB Essentials this is not possible
This is the way
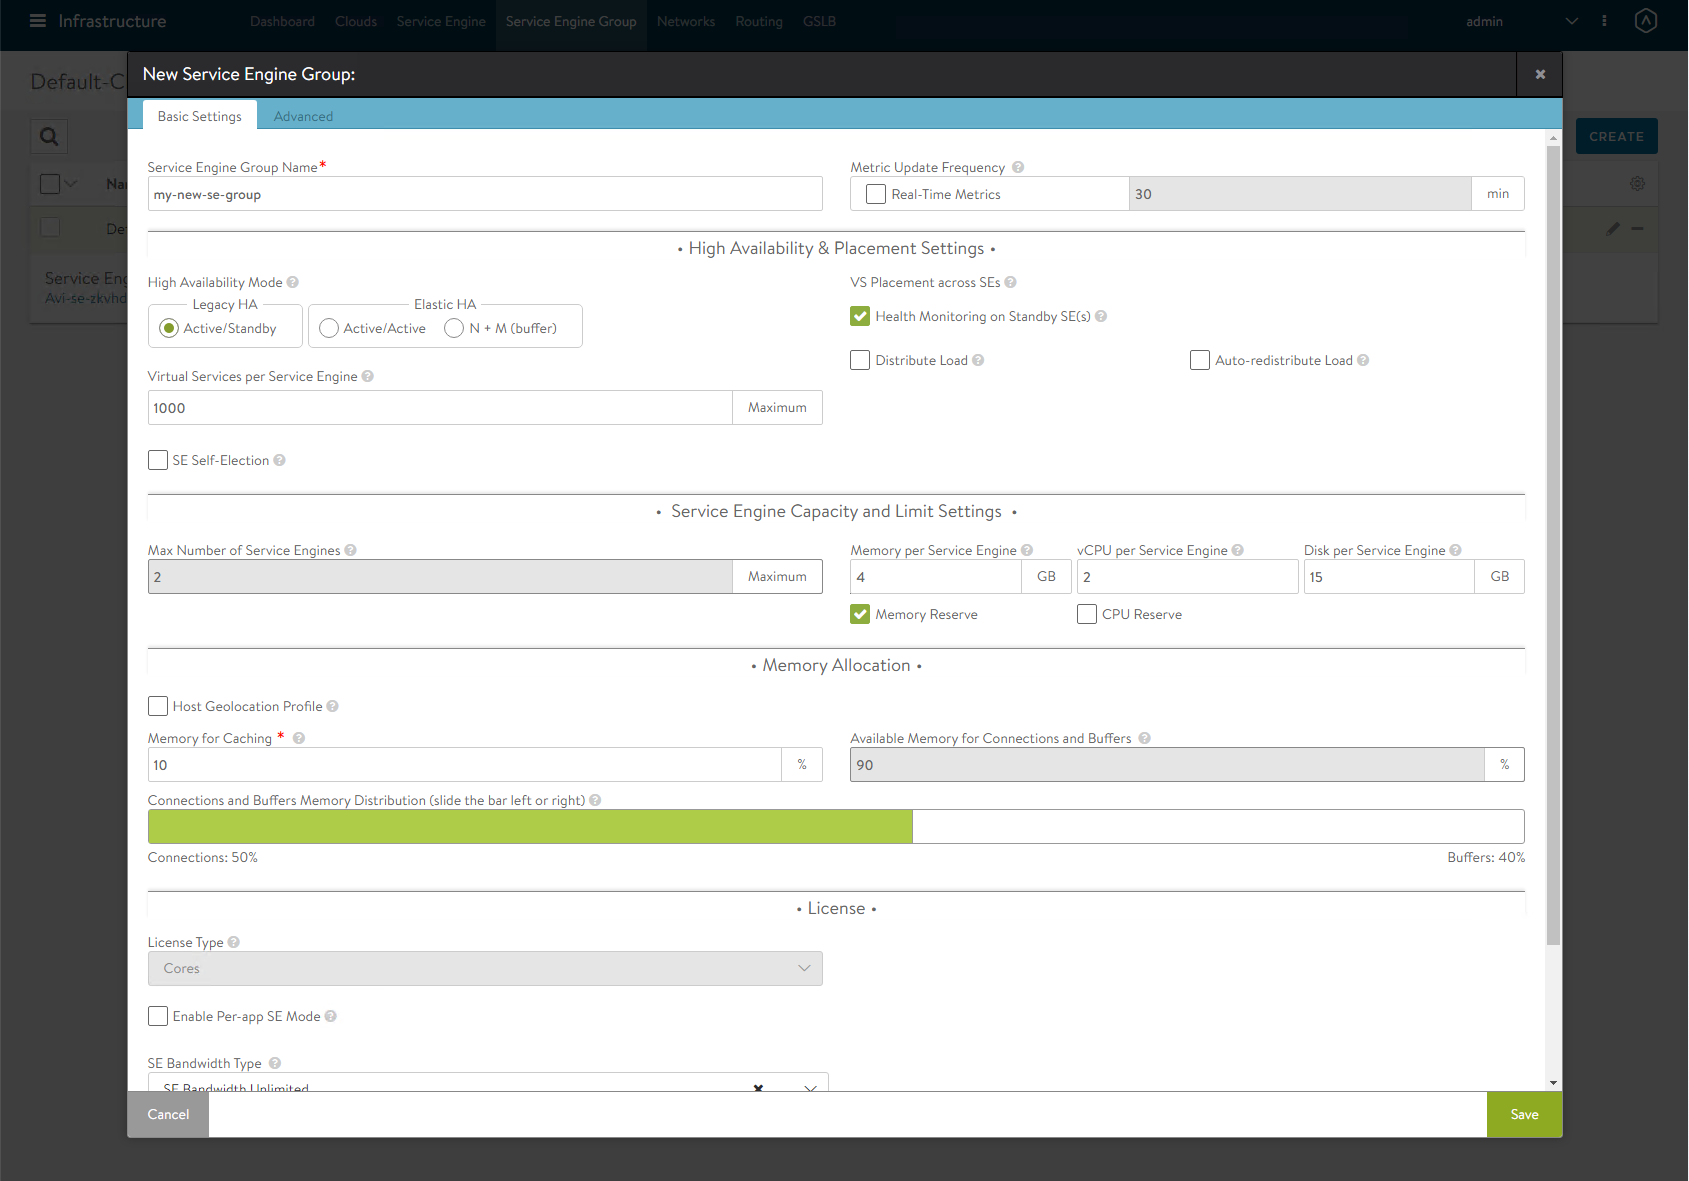
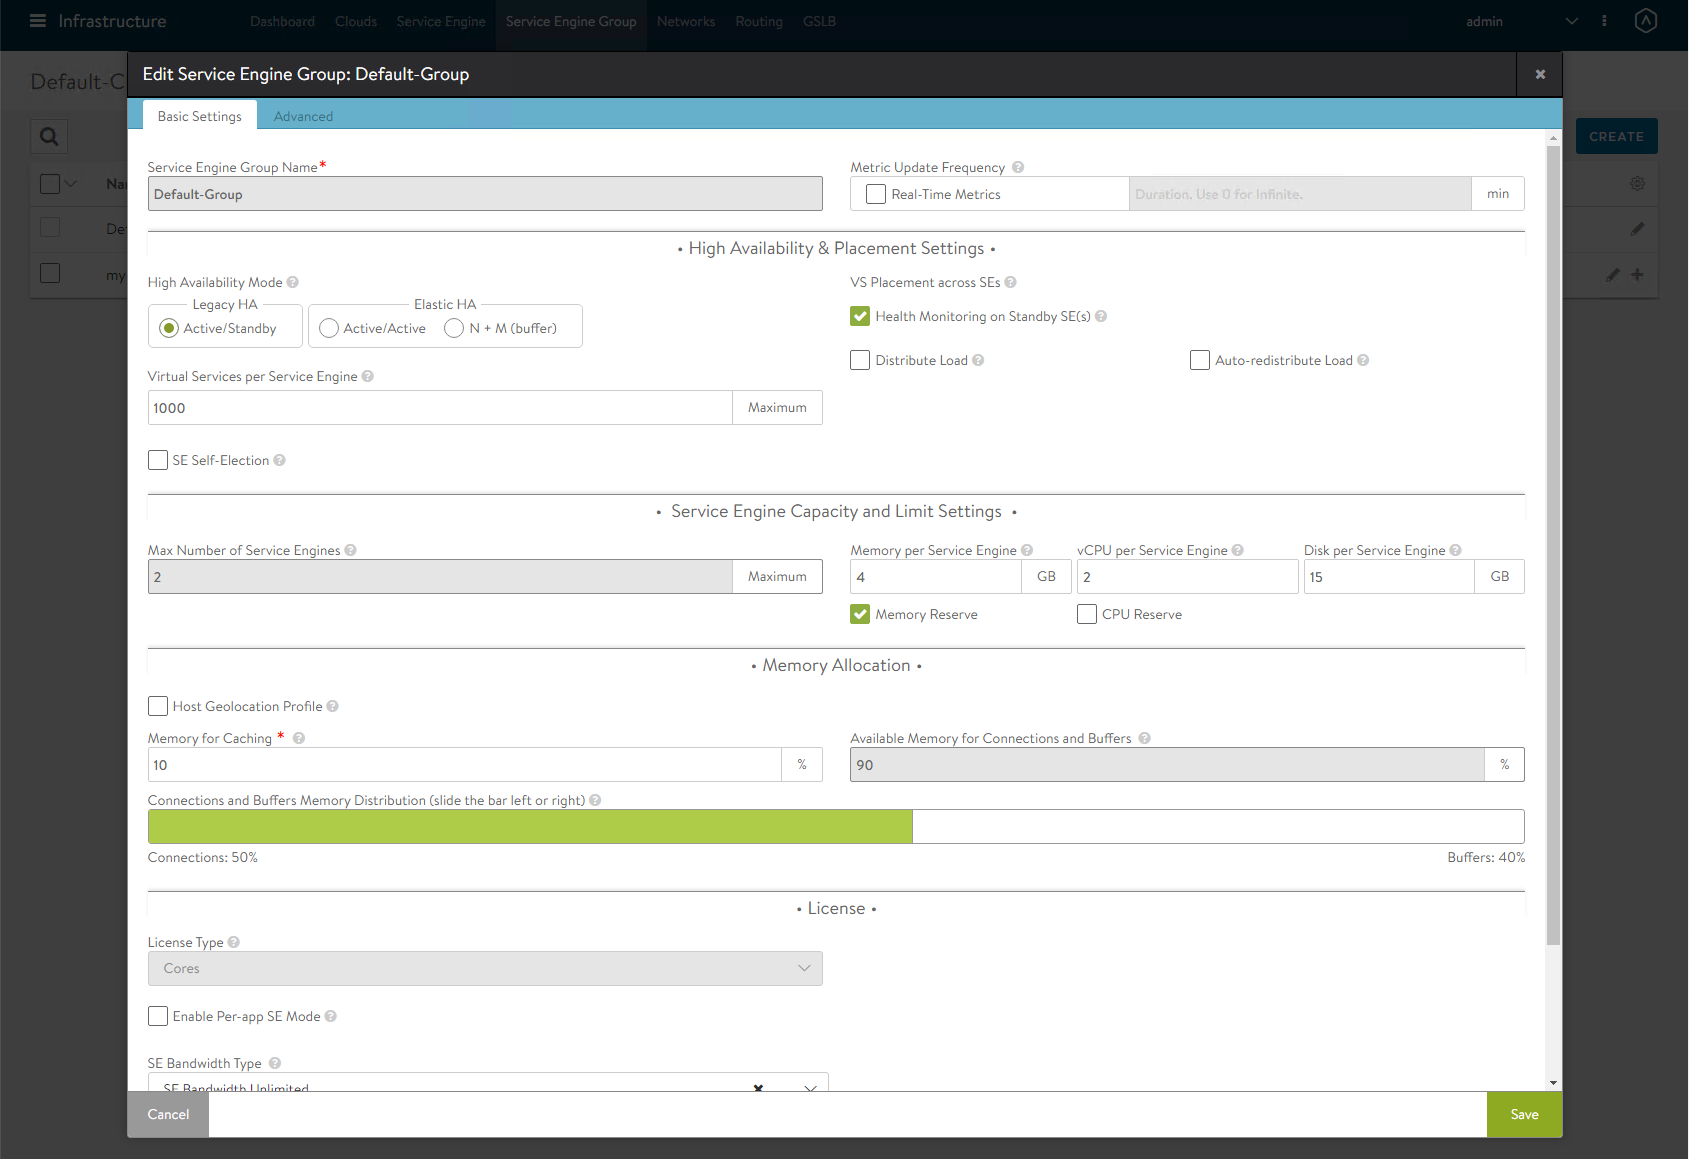
Since we cannot modify the Service Engines in the Default-Group yet, we need to create a New Service Engine Group. Navigate to Infrastrucuture -> Service Engine Group and Click Create. Create a new se group with your settings and the larger resources.
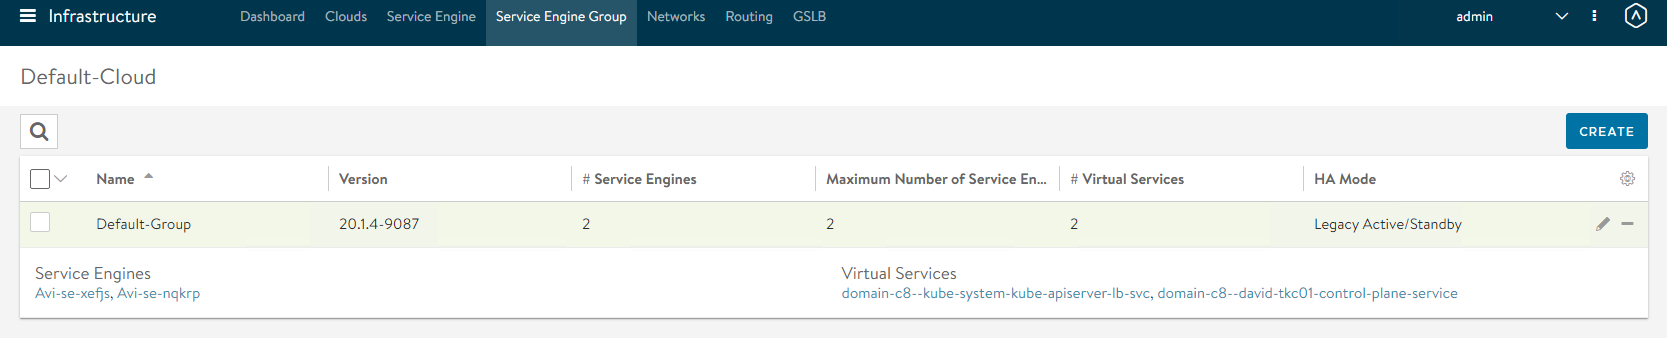
Once you hit save we can see now that we have 2 groups.

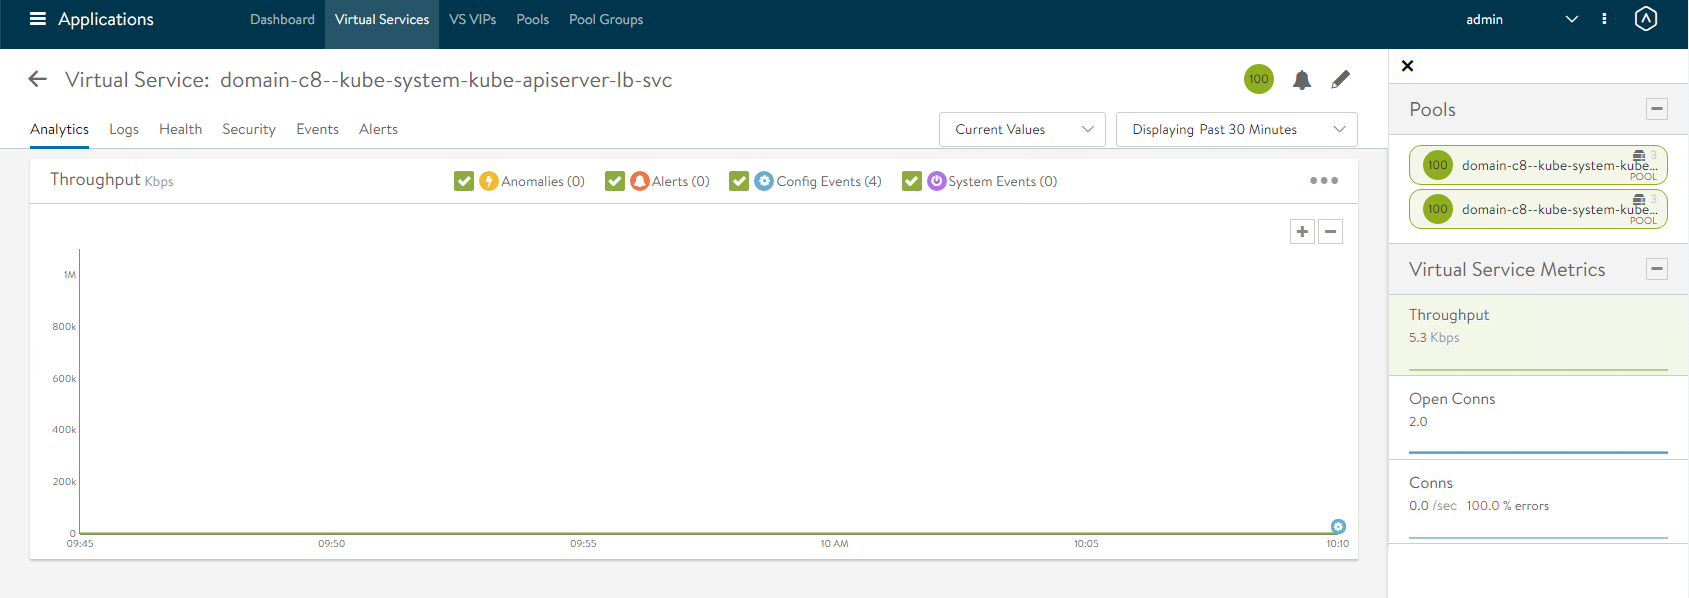
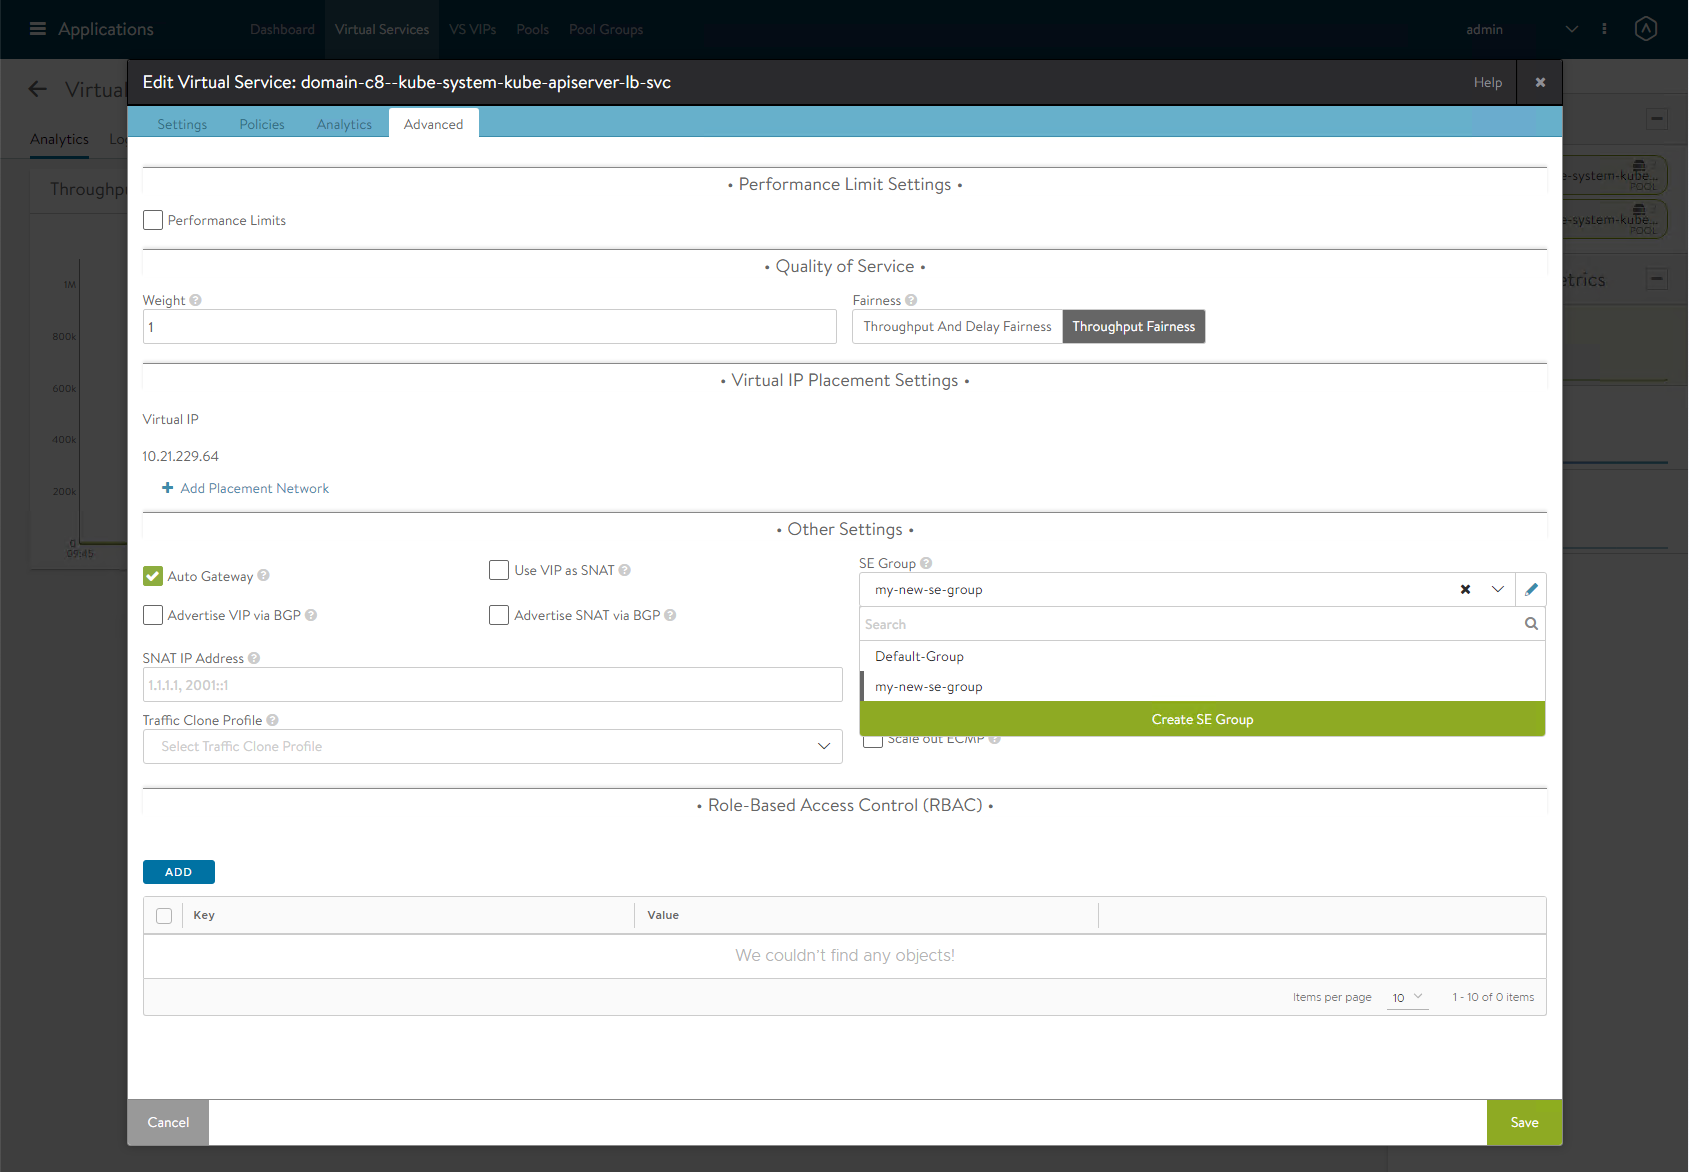
At this point the new Service Engines will not deploy until they are used by a Virtual Service for the least impact move a NON-CRITICAL or new temporary Virtual Service to this new Service Engine Group. To do this navigate to the Virtual Service and Click Edit/Pencil Icon
Navigate to Advanced and change the SE Group to your new temporary one.
You will now see your Virtual Service move over to the new group. Since it uses Legacy Active/Passive the VS will be DOWN as the additional Service Engines deploy. So use a temporary or non-critical VS!
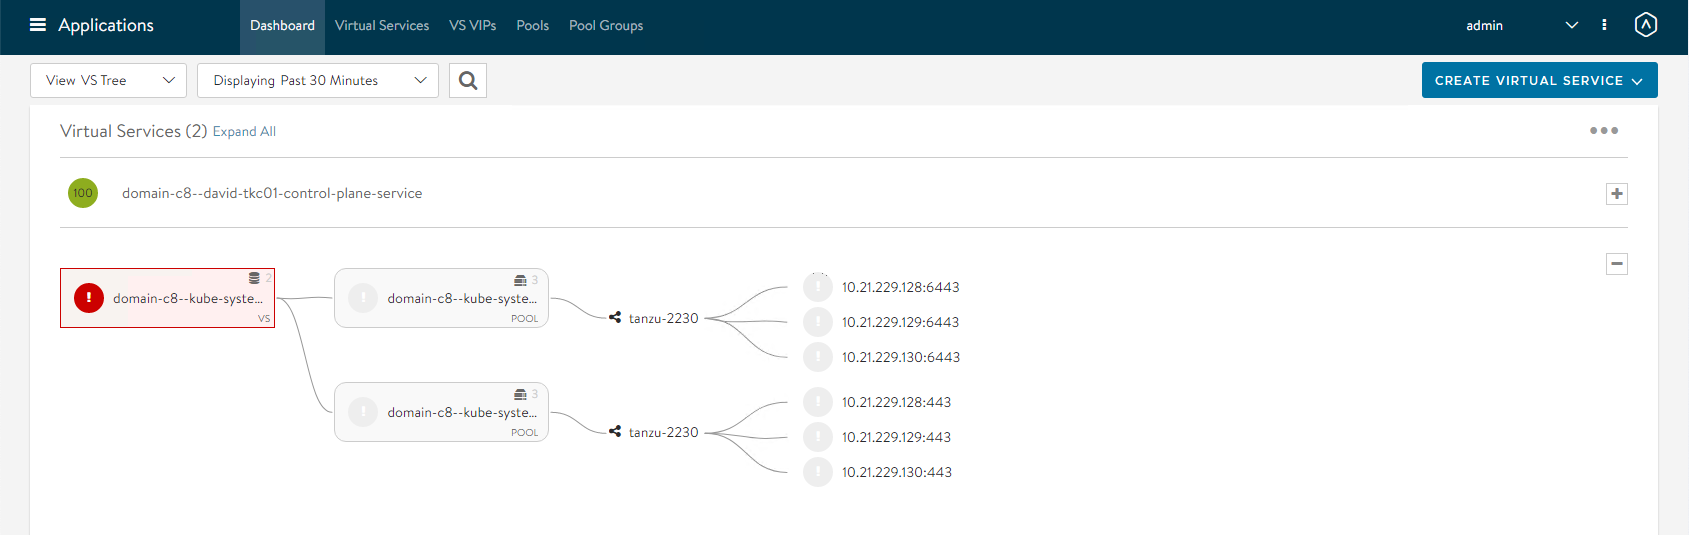
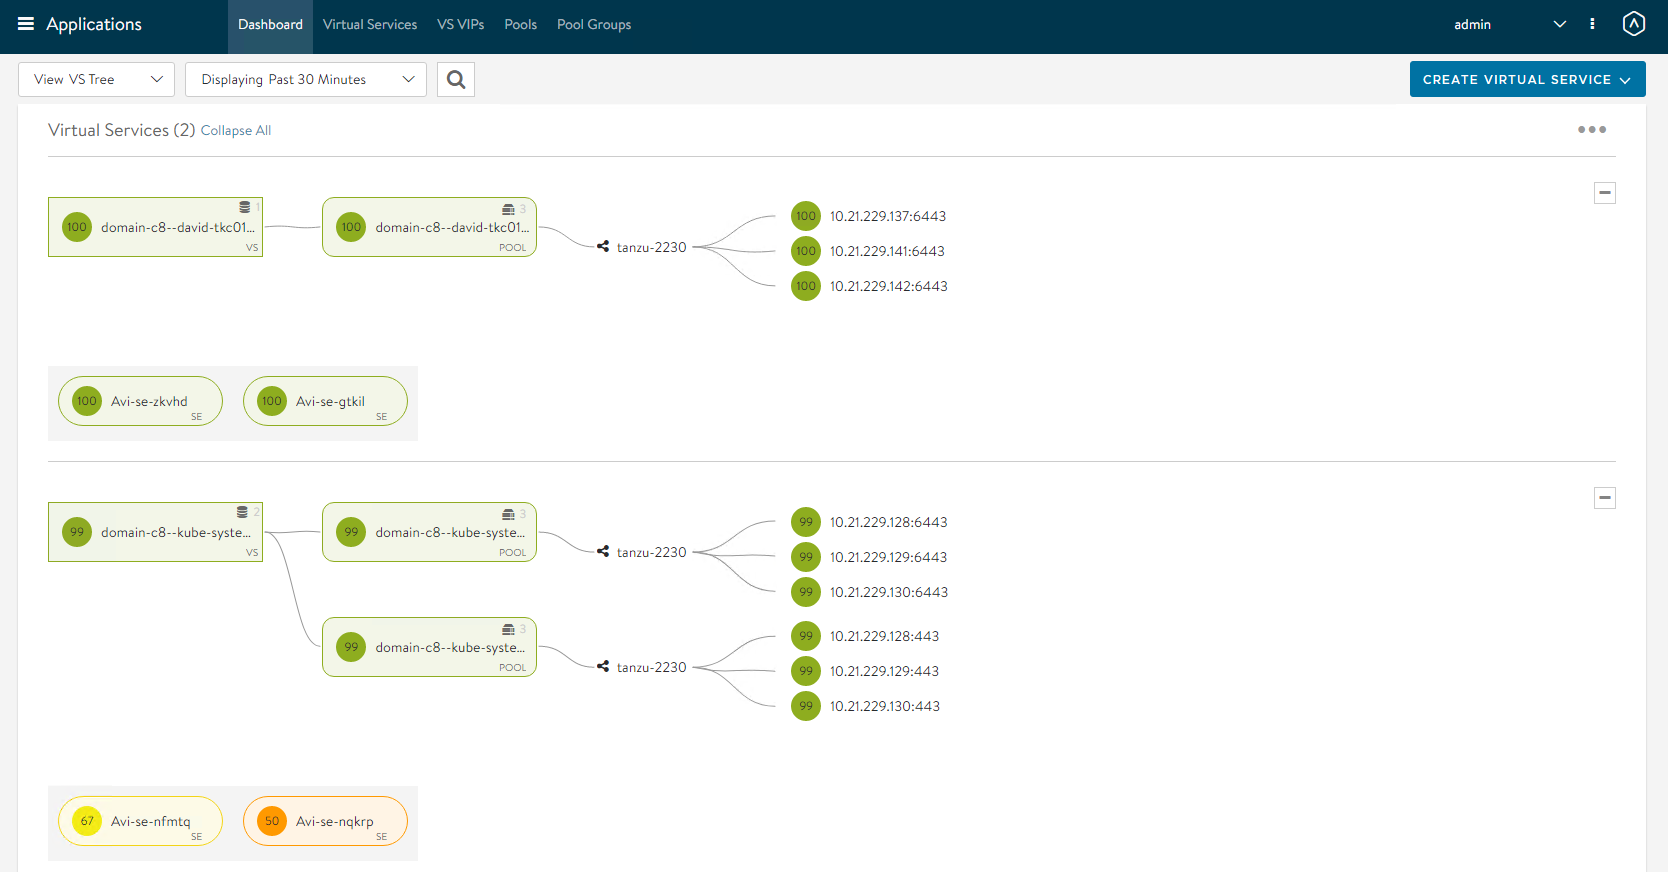
We can see now that one VS is on the new group, and one VS is on the old group. Lets move the remaining virtual services from the Default-Group Service Engines following the steps above. As the Service Engines are already deployed the failover will not be as disruptive.
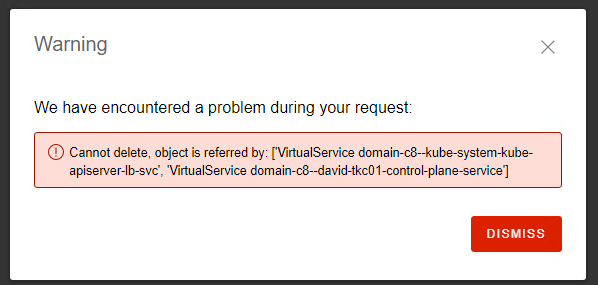
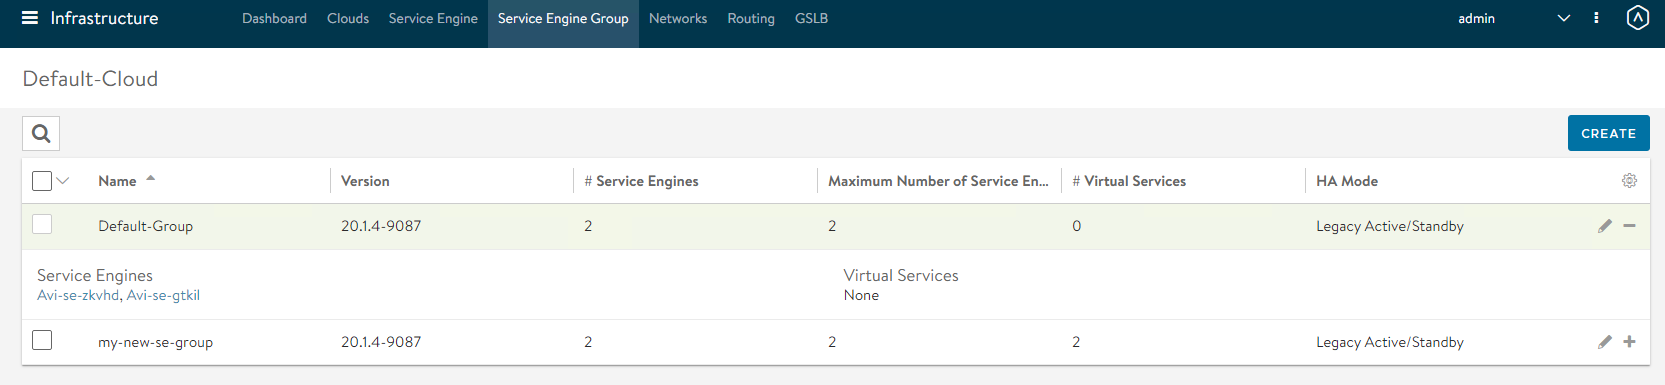
Once complete we can view the Service Engine Group and see there are no longer any Virtual Services associated with it
Select the Unused Service Engines and click Delete
Navigate to Infrastructure -> Service Engine Group and Edit the Default-Group increasing the resources to what you need and Click Save
Move your Virtual Services back to the Default-Group one at a time using the steps above until your Temporary Group is Empty. Delete the Temporary Service Engines and Service Engine Group. You are now done!
Conclusion
I have seen others report that you have to Remove Workload Management to change the Service Engine size but this is not required, follow these steps and you can do it with Workload Management enabled.
If you have any additional questions or comments, please leave them below!
comments powered by DisqusSee Also
- Deploy vSphere with Tanzu using vSphere Networking with the NSX Advanced Load Balancer
- Deploy and Configure the NSX Advanced Load Balancer for vSphere with Tanzu
- Part 6: Deploying vSphere with Kubernetes - Provisioning and Managing a Tanzu Kubernetes Cluster
- Part 5: Deploying vSphere with Kubernetes - Using vSphere with Kubernetes
- Part 4: Deploying vSphere with Kubernetes - Enabling vSphere with Kubernetes