Deploying Tanzu Kubernetes Grid (TKG) on VMware Cloud on AWS (VMC)
In a previous post I covered how you can deploy TKG on vSphere, for the second part of our internal hackathon we had a requirement to install TKG on VMware Cloud on AWS (VMC). This post will go over how I was able to get TKG deployed on VMC.
Getting Started
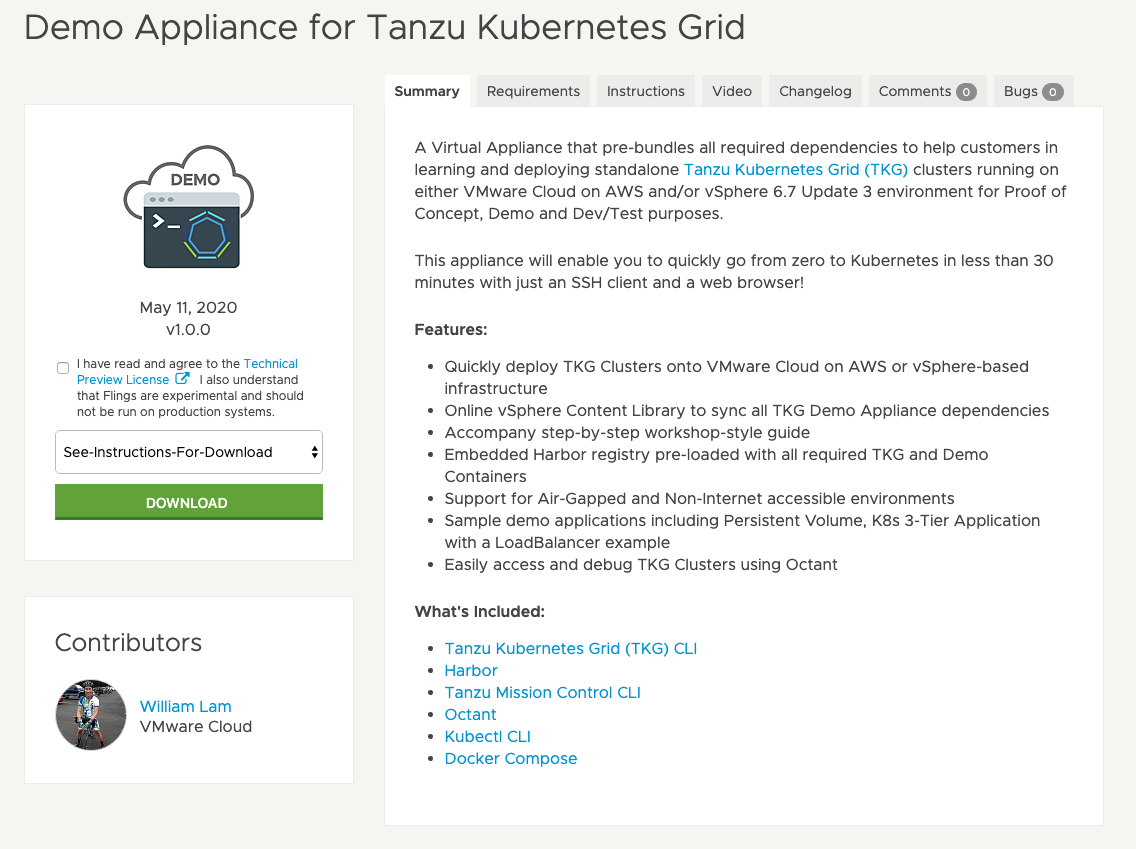
In this blog I will cover using the new VMware Fling Demo Appliance for Tanzu Kubernetes Grid if you wish to configure the TKG CLI locally you can review my previous blog.
The Demo Appliance for TKG contains everything you need to deploy TKG On-Premises or in the cloud, with or without internet access. It includes all images pre-downloaded as well as the Tanzu CLI’s, Harbor, Octant, kubectl and docker.
This appliance actually came in handy, as when I was originally trying to deploy TKG on VMC I was having issues pulling down the images.
Anyone get #TKG deployed on #VMC? Having issues with the tkg cluster deploying..errors pulling images. /cc @lamw @chipzoller Thoughts?
— David Stamen (@davidstamen) May 12, 2020
A few responses later and a chat with William I had the TKG Demo Appliance deployed and deploying TKG and Tanzu Kubernetes Clusters on VMC with ease.
I will not go over the full details on how to deploy the TKG Demo Appliance, but a great set of instructions are located here.
Configuring VMC for TKG
A much more detailed set of instructions can be found as part of the TKG Workshop Guide
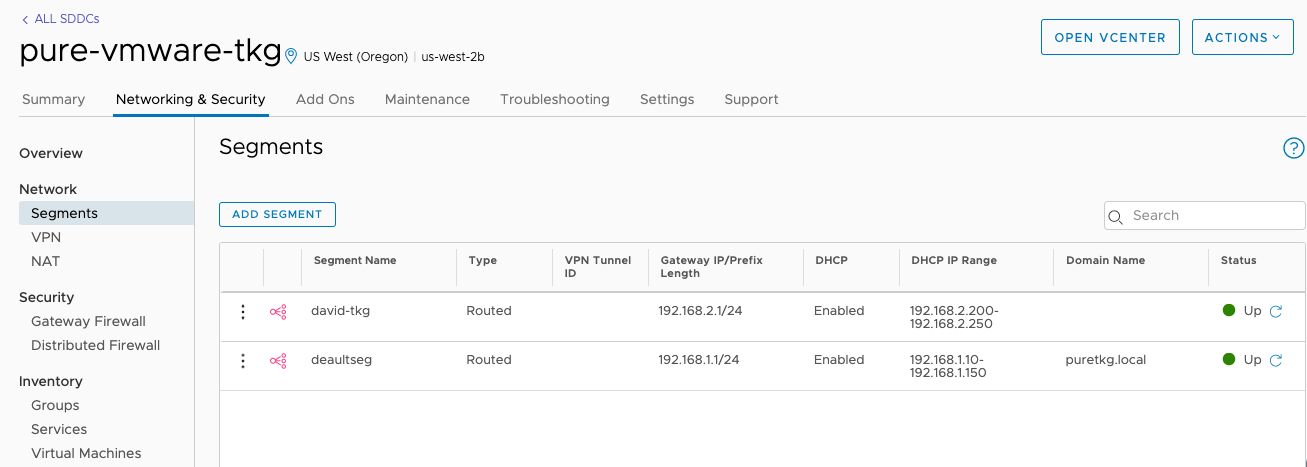
As we start to setup our environment first we will need to create a new network segment in VMC. We will need to first login to the Cloud Console and then navigate to Networking & Security and then to Segments. Click on Add Segment and enter a name, type, gateway/prefix and a DHCP range.
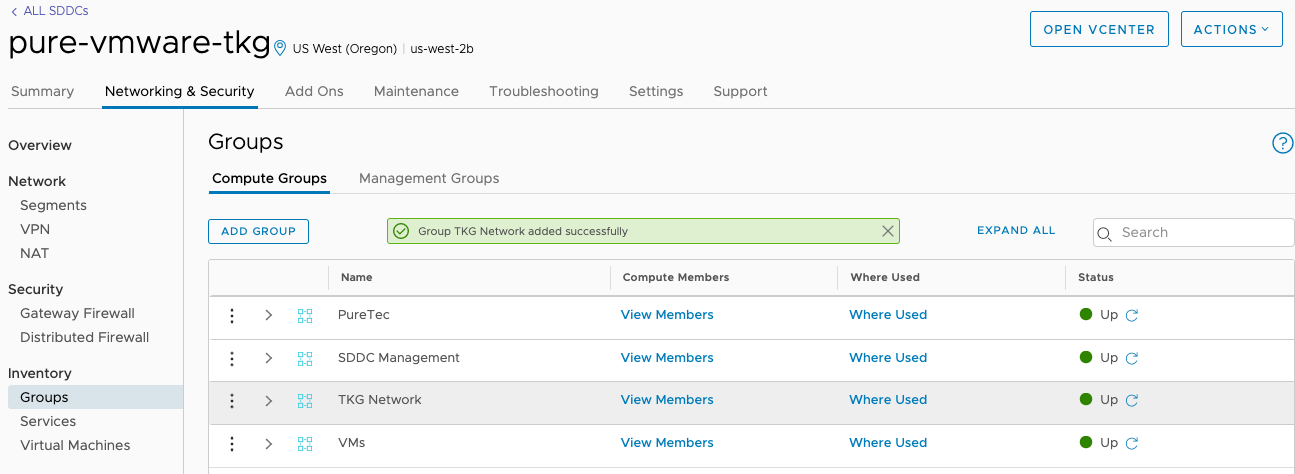
Next we we need to configure our firewalls to allow access, by default everything on VMC is set to Deny. Navigate to Networking & Security and then to Groups under Inventory.
Under Compute Groups we will create three groups.
- Lab Network (This group will contain the IPs that you wish to connect to the TKG Network. In my cause its home, so i will use my IP from whatismyip.com)
- SDDC Management (This group will contain the IPs for the SDDC Management Network, by default this is 10.2.0.0/16)
- TKG Network (this is the segment we created above, 192.168.2.0/24)
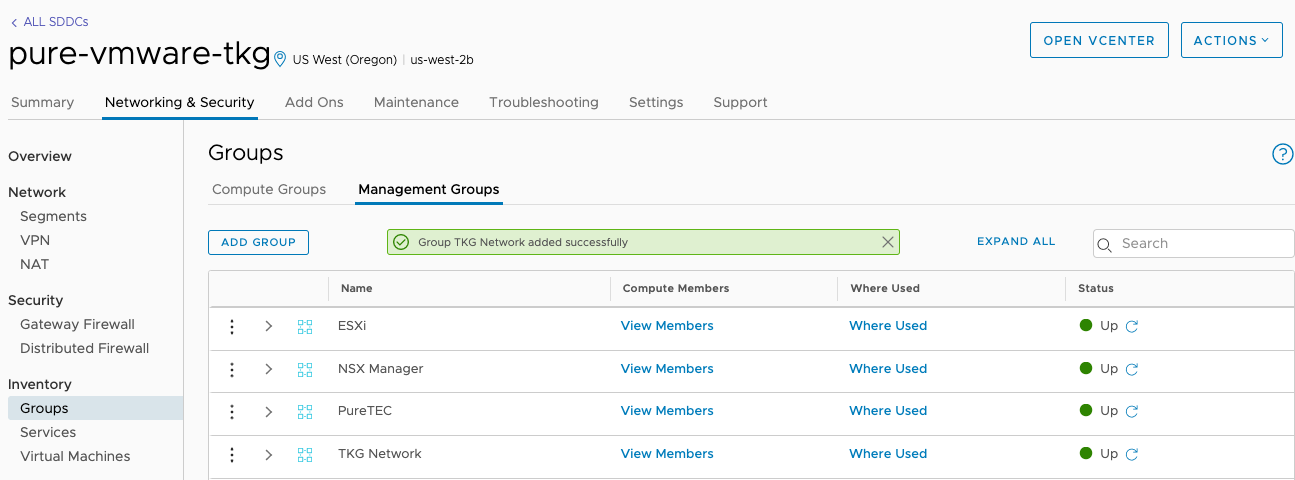
Under Management Groups we will create two groups.
- Lab Network (This group will contain the IPs that you wish to connect to the TKG Network. In my cause its home, so i will use my IP from whatismyip.com)
- TKG Network (this is the segment we created above, 192.168.2.0/24)
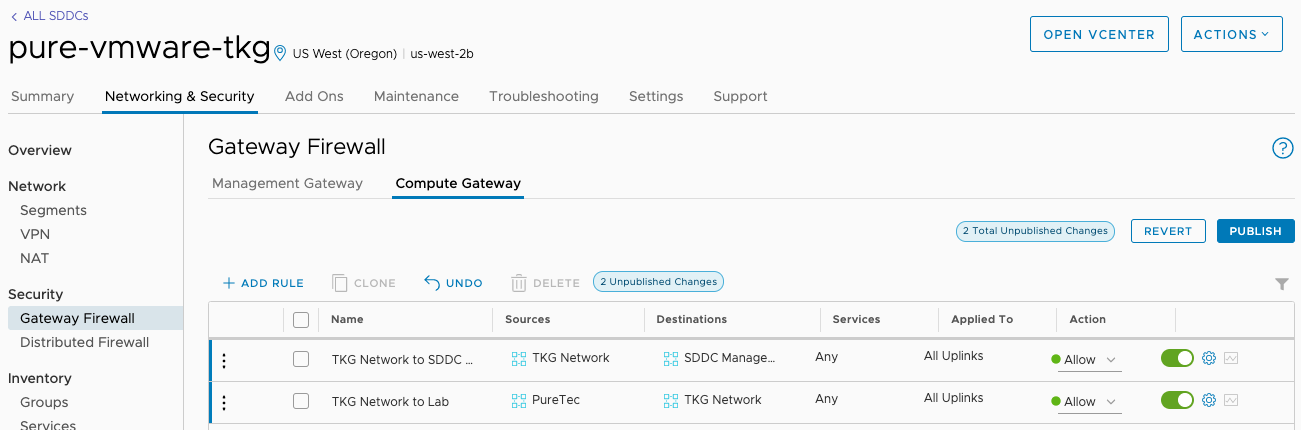
Once our groups are created we can configure the VMC Firewall. Navigate to Networking & Security and then to Gateway Firewall under Security.
Under Compute Gateway create the following rules.
- Lab Network to TKG Network
- TKG Network to SDDC Management
Under Management Gateway create the following rules.
- Lab Network to vCenter Server
- TKG Network to vCenter Server
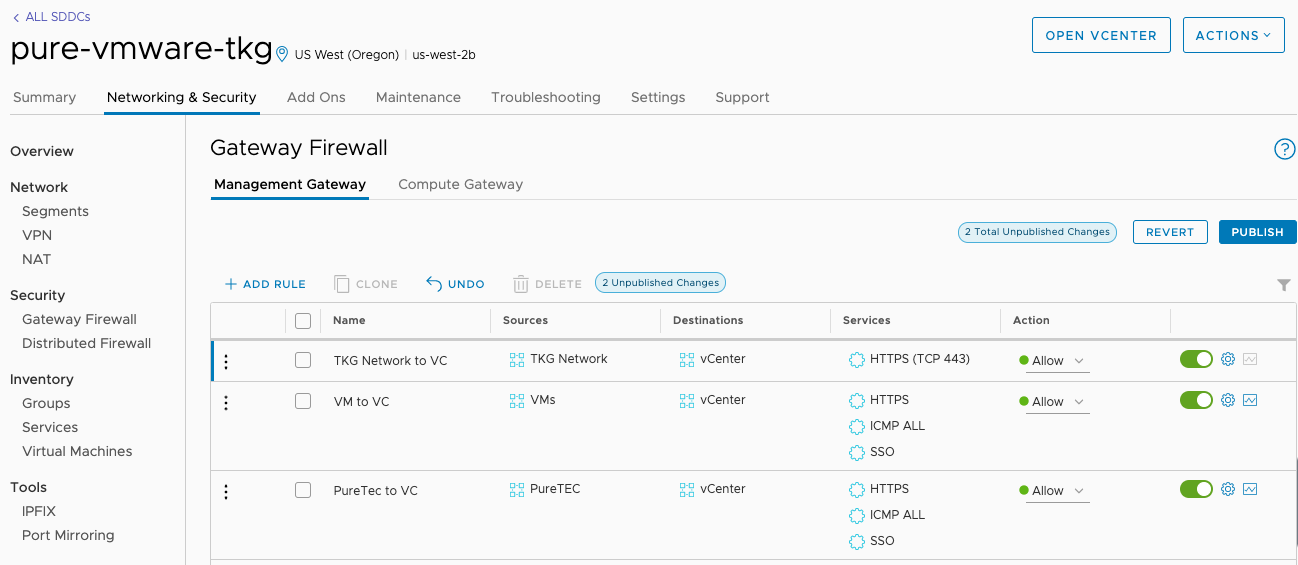
Don’t forget to Publish your changes to active your new firewall rules!
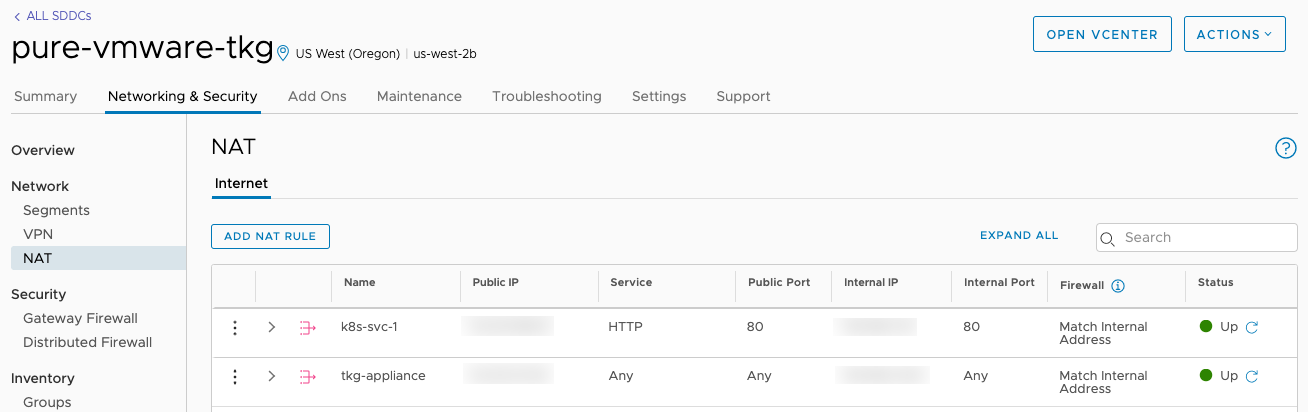
Next we will need to Request a Public IP and Create a NAT Rule to access our TKG Appliance. Navigate to Networking & Security and then to Public IPs under System. Click on Request New IP and enter in a description for your IP.

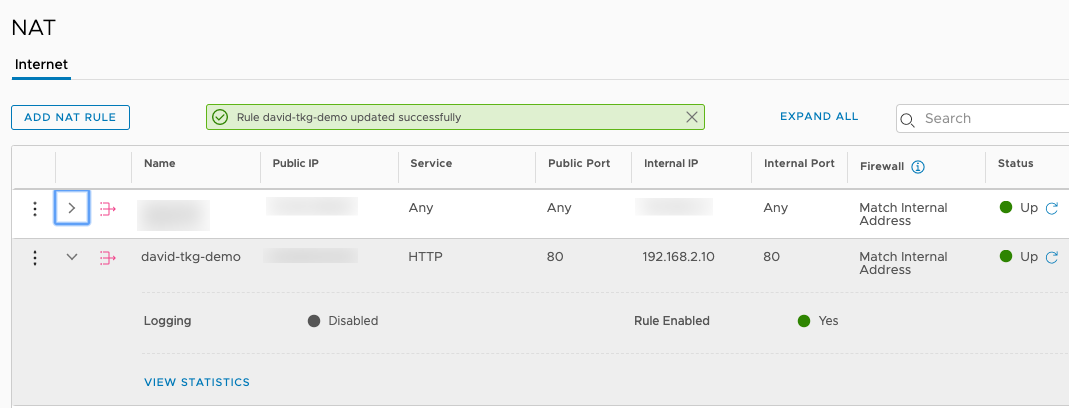
Navigate to Networking & Security and then to NAT under Network. Click on Add NAT Rule and enter in a name, select your public ip, assign a service and available ports.
Once all the networking is configured we can proceed to configure the vCenter Server. We need to import the two templates, this can either by done manually as shown in my previous blog, or you can deploy them from the TKG Demo Content Library
Deploying TKG on VMC
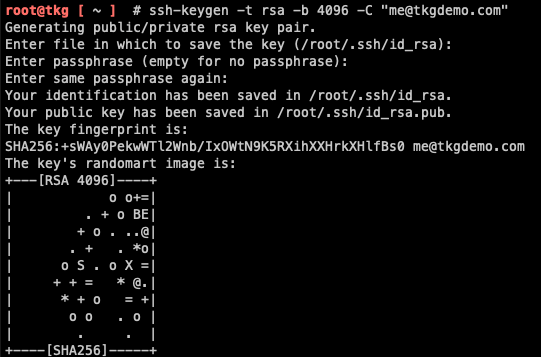
Begin by starting an SSH session to the external IP of your TKG Demo Appliance

Create an SSH Keypair. Instructions are located here. Once created you’ll need to copy your SSH Public Key from ~/.ssh/id_rsa.pub
A sample config.yaml file is located at ~/config.yaml. This will be used to provision our TKG Management Cluster this will need to be filled out for your particular environment. Update the fields to be specific for your environment including the server, password, network, resource pool and folder.
VSPHERE_SERVER: '10.2.224.4'
VSPHERE_USERNAME: '[email protected]'
VSPHERE_PASSWORD: 'FILL-ME-IN'
VSPHERE_DATACENTER: '/SDDC-Datacenter'
VSPHERE_DATASTORE: 'WorkloadDatastore'
VSPHERE_NETWORK: 'david-tkg'
VSPHERE_RESOURCE_POOL: '/SDDC-Datacenter/host/Cluster-1/Resources/Compute-ResourcePool'
VSPHERE_FOLDER: '/SDDC-Datacenter/vm/david'
VSPHERE_TEMPLATE: 'photon-3-kube-v1.17.3_vmware.2'
VSPHERE_HAPROXY_TEMPLATE: 'photon-3-capv-haproxy-v0.6.3_vmware.1'
VSPHERE_DISK_GIB: 30
VSPHERE_NUM_CPUS: 2
VSPHERE_MEM_MIB: 2048
VSPHERE_SSH_AUTHORIZED_KEY: "ssh_key"
SERVICE_CIDR: "100.64.0.0/13"
CLUSTER_CIDR: "100.96.0.0/11"
KUBERNETES_VERSION: v1.17.3+vmware.2
overridesFolder: /root/.tkg/overrides
providers:
  - name: cluster-api
    url: /root/.tkg/providers/cluster-api/v0.3.3/core-components.yaml
    type: CoreProvider
  - name: aws
    url: /root/.tkg/providers/infrastructure-aws/v0.5.2/infrastructure-components.yaml
    type: InfrastructureProvider
  - name: vsphere
    url: /root/.tkg/providers/infrastructure-vsphere/v0.6.3/infrastructure-components.yaml
    type: InfrastructureProvider
  - name: tkg-service-vsphere
    url: /root/.tkg/providers/infrastructure-tkg-service-vsphere/v1.0.0/unused.yaml
    type: InfrastructureProvider
  - name: kubeadm
    url: /root/.tkg/providers/bootstrap-kubeadm/v0.3.3/bootstrap-components.yaml
    type: BootstrapProvider
  - name: kubeadm
    url: /root/.tkg/providers/control-plane-kubeadm/v0.3.3/control-plane-components.yaml
    type: ControlPlaneProvider
images:
    cert-manager:
        repository: registry.rainpole.io/library/cert-manager
        tag: v0.11.0_vmware.1
Save your config file to ~/.tkg/config.yaml
Kick off your Management Cluster deployment by executing tkg init –infrastructure=vsphere. In about ~5-10 minutes your management cluster should now be provisioned.
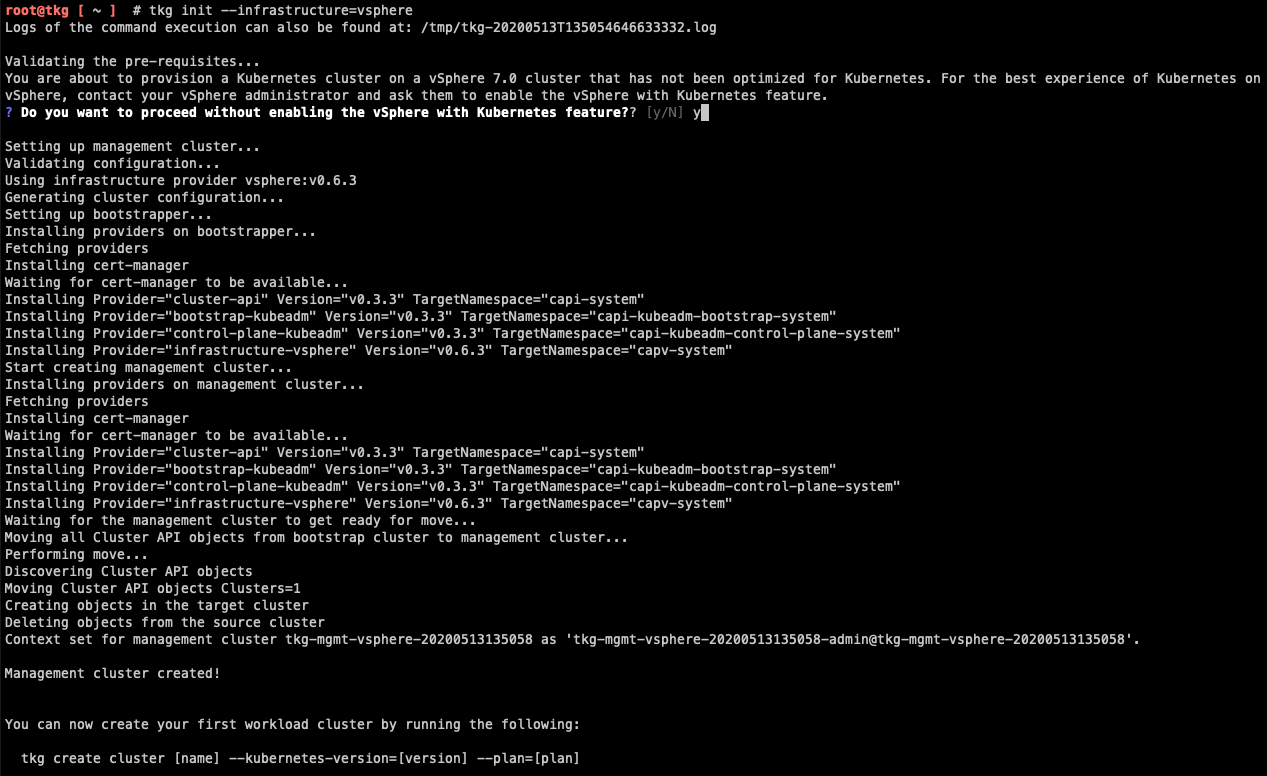
Now that the TKG Management Cluster is Created. We can use TKG to provision a Tanzu Kubernetes Cluster (TKC). Execute tkg create cluster tkc01 –plan=dev. After another ~5-10 minutes your TKC cluster should now be provisioned.

If we want to access our application externally I recommend using MetalLB as its one of the easier pieces I have found to setup.
To install run:
kubectl apply -f https://raw.githubusercontent.com/metallb/metallb/v0.9.3/manifests/namespace.yaml
kubectl apply -f https://raw.githubusercontent.com/metallb/metallb/v0.9.3/manifests/metallb.yaml
# On first install only
kubectl create secret generic -n metallb-system memberlist --from-literal=secretkey="$(openssl rand -base64 128)"
You will then need to execute a YAML to specify an IP Pool to use.
apiVersion: v1
kind: ConfigMap
metadata:
  namespace: metallb-system
  name: config
data:
  config: |
    address-pools:
    - name: default
      protocol: layer2
      addresses:
      - 192.168.2.10 - 192.168.2.20
Deploy your application, I like to use hipster shop as a demo.
kubectl apply -f https://raw.githubusercontent.com/dstamen/Kubernetes/master/demo-applications/demo-hipstershop.yaml
Once deployed find out its External-IP and Port using kubectl get svc.

Next, request a new Public IP from VMC and Create a NAT Rule to access our service.
If we access our public ip we can see our application running!

Conclusion
TKG is a very flexible component to get k8s deployed on either your cloud or on-premises VMware environments. Using the TKG Demo Appliance you can be up and running with a TKC Cluster very quickly! This is a great use case for any sort of test/dev/poc.
Questions or Comments? Leave them below!
comments powered by DisqusSee Also
- Deploying Tanzu Kubernetes Grid (TKG) on vSphere
- Part 6: Deploying vSphere with Kubernetes - Provisioning and Managing a Tanzu Kubernetes Cluster
- Part 5: Deploying vSphere with Kubernetes - Using vSphere with Kubernetes
- Part 4: Deploying vSphere with Kubernetes - Enabling vSphere with Kubernetes
- Part 3: Deploying vSphere with Kubernetes - Deploy and Configure NSX-T